How to Build an AI Agent Using Browser-User and Playwright
Building an AI agent involves setting up the right tools and technologies. In this guide, we will use Python, Browser-User, Playwright, and Web-UI to create and run an AI agent step by step.
Technologies Used:
- Python (Python.org) – A versatile programming language that will be the foundation of our AI agent.
- Browser-User (GitHub Repository) – A framework that enables browser automation and interaction.
- Browser-User/Web-UI (GitHub Repository) – Provides a graphical interface to interact with the AI agent.
- Playwright – A powerful browser automation library for running headless browsers.
Steps to Build the AI Agent:
Step 1: Open the Terminal
The first step is to open your terminal (Command Prompt or PowerShell on Windows, Terminal on macOS/Linux). Ensure Python is installed by running:
python --versionIf Python is not installed, download it from Python.org and install it before proceeding.
Step 2: Install Required Packages
Now, install the necessary dependencies:
pip3 install browser-use
playwright installbrowser-useis the core package that facilitates browser-based AI interactions.playwright installensures that all necessary browser dependencies are installed.
Step 3: Create a Project Folder
Organize your project files by creating a dedicated folder:
mkdir ai-agent
cd ai-agent
mkdir ai-agentcreates a new directory namedai-agent.cd ai-agentmoves inside the created directory.
Step 4: Clone the Web-UI Repository
To get the necessary UI components, clone the Web-UI repository:
git clone https://github.com/browser-use/web-ui...
cd web-ui
git clonedownloads the Web-UI files.cd web-uimoves into the Web-UI project folder.
Step 5: Install UV Package Manager
UV is a fast Python package manager that helps manage dependencies efficiently.
curl -LsSf https://astral.sh/uv/install.sh | sh- This command downloads and installs UV on your system.
- UV provides better dependency management compared to traditional pip.
Step 6: Restart the Terminal and Navigate Back to Web-UI
After installing UV, restart your terminal to ensure the changes take effect. Once restarted, navigate back to the project folder:
cd ai-agent/web-uiStep 7: Create and Activate a Virtual Environment
A virtual environment ensures that your project dependencies remain isolated.
uv venv --python 3.11
source .venv/bin/activate
uv venv --python 3.11creates a virtual environment using Python 3.11.source .venv/bin/activateactivates the virtual environment, ensuring all installations remain project-specific.
Step 8: Install Project Dependencies
With the virtual environment activated, install the required dependencies:
uv pip install -r requirements.txt- This command reads the
requirements.txtfile and installs all necessary dependencies for the Web-UI.
Step 9: Run the Web-UI Server
To start the Web-UI and interact with the AI agent, execute:
python webui.py --ip 127.0.0.1 --port 7788- The Web-UI will start running on
127.0.0.1:7788. - You should see a message in the terminal indicating that the server is running.
Step 10: Copy and Paste the Generated IP Address
Once the Web-UI server starts, it will display an IP address (typically http://127.0.0.1:7788).
- Copy this IP address and paste it into your web browser.
- This will open the Web-UI where you can interact with the AI agent.
Step 11: Obtain and LLM Configure the Gemini API
To enable AI capabilities, obtain an API key from Google AI Studio:
- Go to Google AI Studio.
- Generate a Gemini API key.
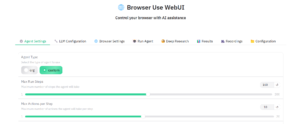
- Open the Browser-UI settings in your Web-UI.
- Paste the API key in the appropriate field to enable AI functionalities.
Step 12: Run the AI Agent
With everything set up, you can now run the AI agent directly from the Web-UI.
- Click on the Run Agent button in the Web-UI.
- The AI agent will start processing tasks, interacting with web pages, and executing commands.
Youtube Tutorial : https://www.youtube.com/watch?v=1T-RGgyY0LA
Conclusion
By following these detailed steps, you will successfully set up and run an AI agent using Browser-User, Playwright, and Web-UI. You can now experiment with different configurations, enhance the AI agent’s capabilities, and integrate additional features.